
| 일 | 월 | 화 | 수 | 목 | 금 | 토 |
|---|---|---|---|---|---|---|
| 1 | 2 | 3 | 4 | |||
| 5 | 6 | 7 | 8 | 9 | 10 | 11 |
| 12 | 13 | 14 | 15 | 16 | 17 | 18 |
| 19 | 20 | 21 | 22 | 23 | 24 | 25 |
| 26 | 27 | 28 | 29 | 30 | 31 |
- Jenkins
- svn backup
- 줄복사
- ^M바꾸기
- jdbc
- docker
- spring boot
- duplicate lines
- javaascript
- driverspy
- pkgutil
- change file content
- gradle
- remove
- Java
- install maven
- JavaScript
- object
- maven
- Change port
- spring
- ubuntu
- JAR
- mariadb
- not to accept jdbcUrl
- local
- ADB
- key bindings
- install
- 전송포맷
- Today
- Total
Simplify
윈도우 10 에서 FTP 서버 활성화하고 관리하기 (How to set up and manage an FTP server on Windows 10) 본문
윈도우 10 에서 FTP 서버 활성화하고 관리하기 (How to set up and manage an FTP server on Windows 10)
Simplify - Jonghun 2019. 6. 5. 08:41How to install an FTP server on Windows 10
Very similar to previous versions, Windows 10 includes the necessary components to run an FTP server. Follow the steps below to install an FTP server on your PC:
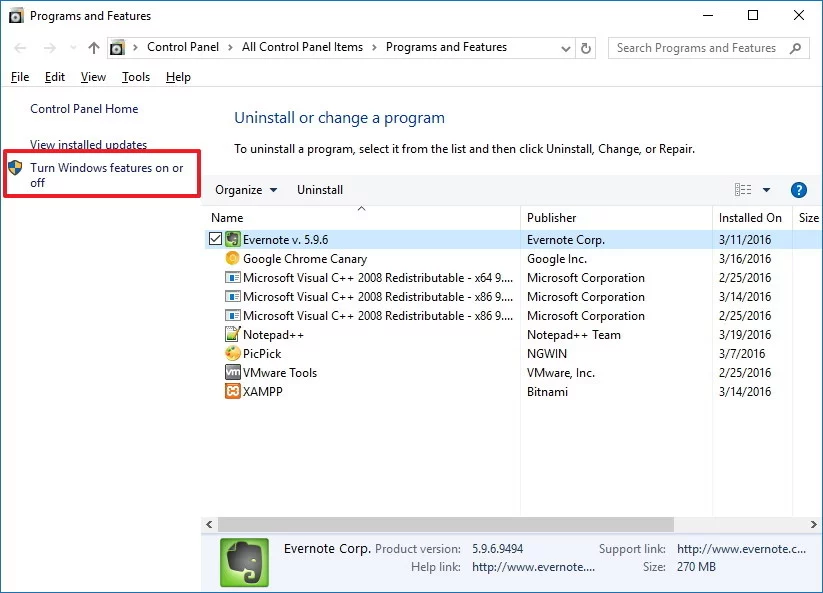
1. Use the Windows key + X keyboard shortcut to open the Power User menu and select Programs and Features.
2. Click the Turn Windows features on or off link.
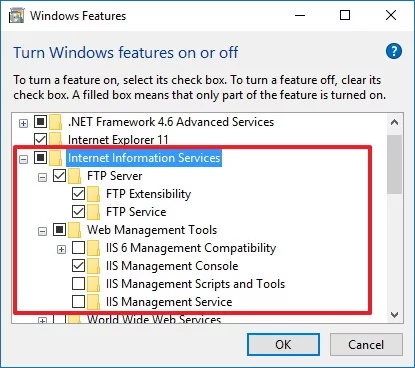
3. Expand Internet Information Services and check the FTP Server option.
4. Expand FTP Server and check the FTP Extensibility option.
5. Check Web Management Tools with the default selections.
6. Click OK to begin the installation.
7. Click Close.
How to configure an FTP site on Windows 10
After installing the necessary components to run an FTP server on your PC, you need to create an FTP site using the following instructions:
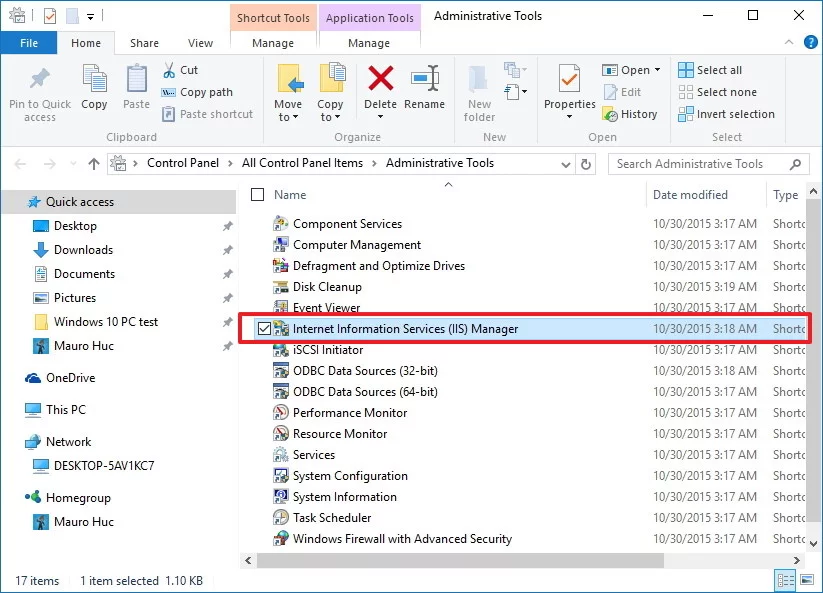
1. Use the Windows key + X keyboard shortcut to open the Power User menu and select Control Panel.
2. Open Administrative Tools.
3. Double-click Internet Information Services (IIS) Manager.
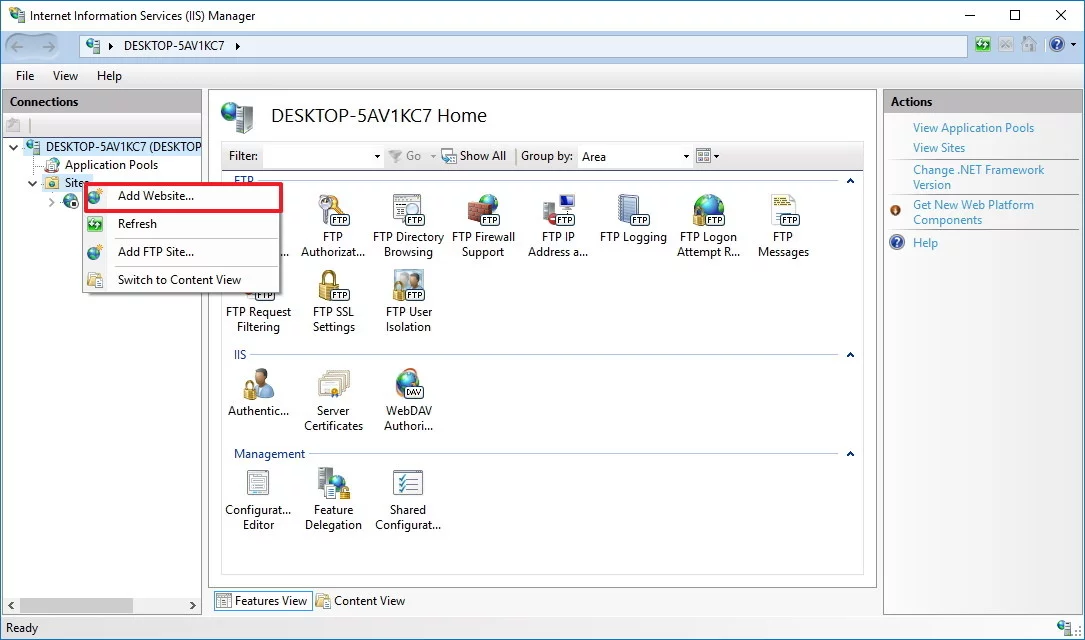
4. Expand and right-click Sites on the Connections pane.
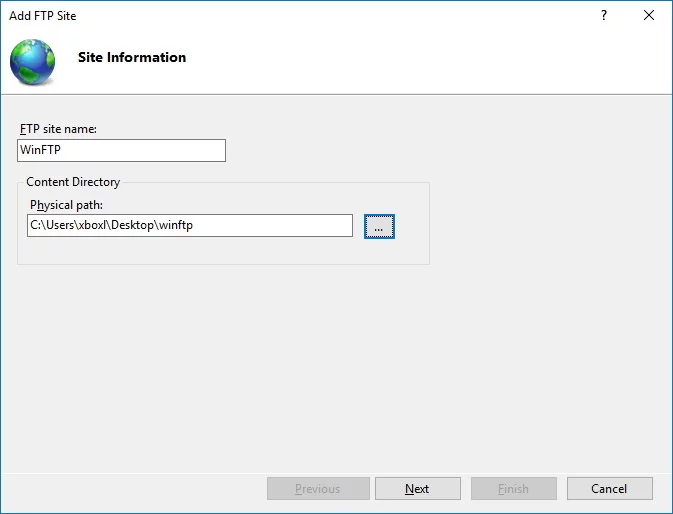
5. Select Add FTP Site.
6. Name your new FTP site and enter the path to the FTP folder you want to use to send and receive files.
Note: You can also use the Make New Folder button to create a specific folder to store your FTP files.
Note: You can also use the Make New Folder button to create a specific folder to store your FTP files.
7. Click Next.
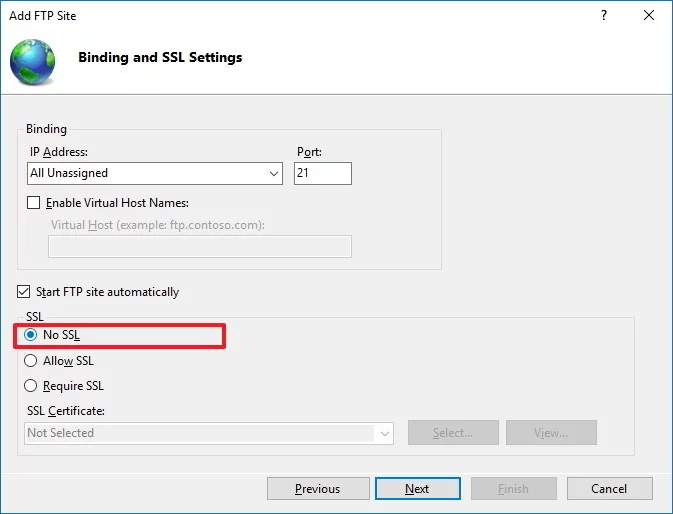
8. On Binding and SSL Settings leave all the default settings, but change the SSL option to No SSL.
Note: It’s worth pointing out that in a business environment or on an FTP server that will host sensitive data, it’s best practice to configure the site to require SSL.
Note: It’s worth pointing out that in a business environment or on an FTP server that will host sensitive data, it’s best practice to configure the site to require SSL.
9. Click Next.
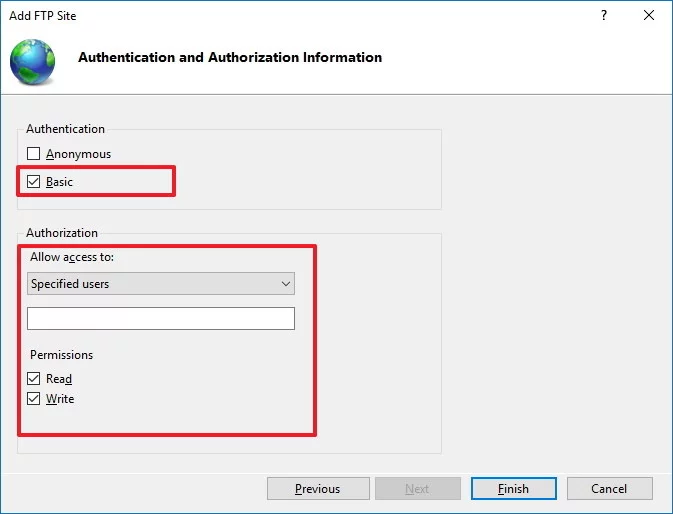
10. On Authentication, check the Basic option.
11. On Authorization, select Specified users from the drop-down menu.
12. Type the email address of your Windows 10 account or local account name to allow yourself access to the FTP server.
13. Check the options Read and Write.
14. Click Finish.
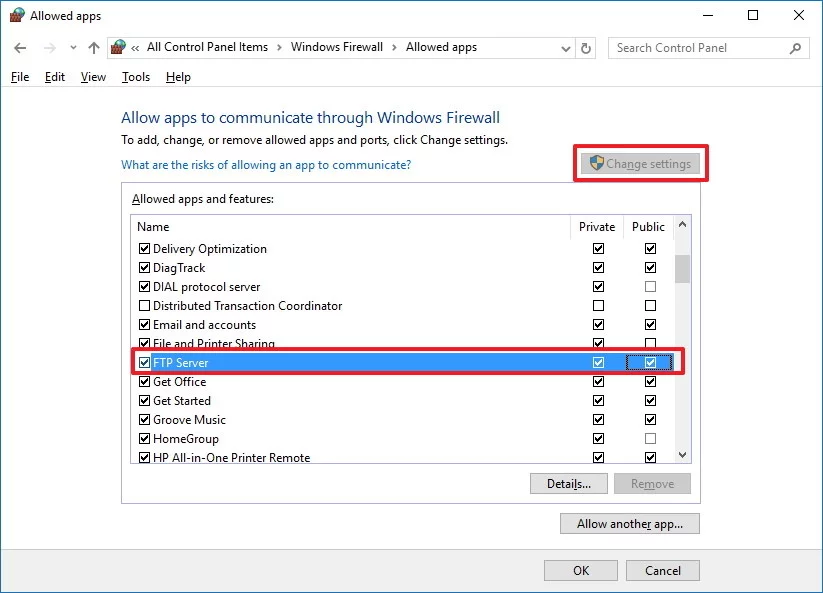
How to allow an FTP server through Windows Firewall
If you have Windows Firewall running on your computer, then the security feature will block any connections trying to access the FTP server. Use the steps below to allow the FTP server through the firewall.
1. Open the Start menu, do a search for Windows Firewall, and press Enter.
2. Click the Allow an app or feature through Windows Firewall link.
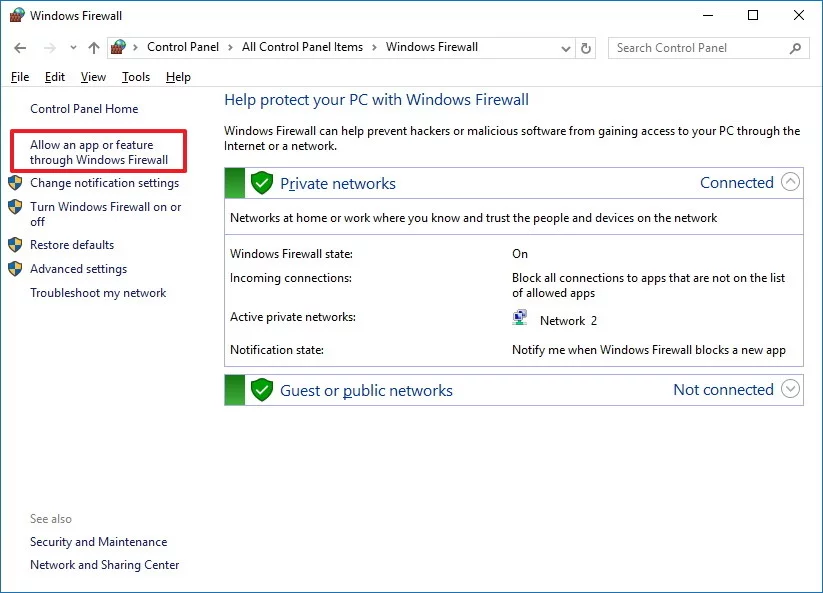
3. Click the Changes settings button.
4. Select FTP Server and make sure to allow it on a Private and Publicnetwork.
5. Click OK.
At this point, you should be able to use your favorite FTP client to connect your newly created FTP server from your local network.
Note: Make sure to check your software vendor support website for specific instructions to allow an FTP server, if you’re using another security software other than the Windows Firewall.
출처 : https://www.windowscentral.com/how-set-and-manage-ftp-server-windows


